In Part 1 of this tutorial, you saw that publishing events using the Publish-Subscribe pattern reduces coupling and makes maintaining a system easier in the long run. Then, in Part 2 you saw how to handle failures gracefully. Now, let's look at how you can add an additional subscriber without needing to modify any existing code.
If you didn't already download the Quick Start solution in the previous lesson, you can download it now:
As shown in the diagram, you will add a new messaging endpoint to the solution called Shipping that will subscribe to the OrderPlaced event.

In this tutorial, you will use terminal commands like dotnet new, dotnet add package, and dotnet add reference, but you can do the same things using the graphical tools in your IDE if you prefer.
Create a new endpoint
On this step, you will create the Shipping project and set up its dependencies.
First, make sure both browser windows and all console applications are closed. Then, in the terminal, navigate to the root of the project where the RetailDemo.sln file is located:
> cd tutorials-quickstart
Next, create a new Console Application project named Shipping and add it to the solution:
> dotnet new console --name Shipping --framework net6.0
> dotnet sln add Shipping
Now, add references to the Messages project, as well as the NuGet packages you will need.
> dotnet add Shipping reference Messages

> dotnet add Shipping package NServiceBus
> dotnet add Shipping package NServiceBus.Extensions.Hosting
> dotnet add Shipping package NServiceBus.Heartbeat
> dotnet add Shipping package NServiceBus.Metrics.ServiceControl
Now that you have a project for the Shipping endpoint, you need to add its implementation to configure and start it as an NServiceBus endpoint. In the Shipping project, find the auto-generated Program.cs file and replace its contents with the following. Take special note of the inline comments, which provide more context to each of the settings of NServiceBus being used.
using System;
using System.Threading.Tasks;
using Microsoft.Extensions.Hosting;
using NServiceBus;

namespace Shipping
{
    class Program
    {
        static async Task Main(string[] args)
        {
            Console.Title = "Shipping";
            await CreateHostBuilder(args).RunConsoleAsync();
        }

        public static IHostBuilder CreateHostBuilder(string[] args)
        {
            return Host.CreateDefaultBuilder(args)
                       .UseNServiceBus(context =>
                       {
                           // Define the endpoint name
                           var endpointConfiguration = new EndpointConfiguration("Shipping");

                           // Choose JSON to serialize and deserialize messages
                           endpointConfiguration.UseSerialization<SystemJsonSerializer>();

                           // Select the learning (filesystem-based) transport to communicate
                           // with other endpoints
                           endpointConfiguration.UseTransport<LearningTransport>();

                           // Enable monitoring errors, auditing, and heartbeats with the
                           // Particular Service Platform tools
                           endpointConfiguration.SendFailedMessagesTo("error");
                           endpointConfiguration.AuditProcessedMessagesTo("audit");
                           endpointConfiguration.SendHeartbeatTo("Particular.ServiceControl");

                           // Enable monitoring endpoint performance
                           var metrics = endpointConfiguration.EnableMetrics();
                           metrics.SendMetricDataToServiceControl("Particular.Monitoring",
                               TimeSpan.FromMilliseconds(500));

                           // Return the completed configuration
                           return endpointConfiguration;
                       });
        }
    }
}
You want the Shipping endpoint to run when you debug the solution, so use Visual Studio's multiple startup projects feature to configure the Shipping endpoint to start along with ClientUI, Sales, and Billing.
To launch the Shipping endpoint with the rest of the solution when using Visual Studio Code, navigate to the Run and Debug tab and select the Debug All + Shipping launch configuration from the dropdown list.
Create a new message handler
Next, you need a message handler to process the OrderPlaced event. When NServiceBus starts, it will detect the message handler and will subscribe to the event automatically.
To create the message handler:
- In the Shipping project, create a new class named
OrderPlacedHandler..cs - Mark the handler class as public, and implement the
IHandleMessagesinterface.<OrderPlaced> - Add a logger instance, which will allow you to take advantage of the logging system used by NServiceBus. This has an important advantage over
Console.: the entries written with the logger will appear in the log file in addition to the console. Use this code to add the logger instance to the handler class:WriteLine() static ILog log = LogManager.GetLogger<OrderPlacedHandler>(); - Within the
Handlemethod, use the logger to record when theOrderPlacedmessage is received, including the value of theOrderIdmessage property:log.Info($"Shipping has received OrderPlaced, OrderId = {message.OrderId}"); - Since everything in this handler method is synchronous, you can return
Task..CompletedTask
When complete, the OrderPlacedHandler class should look like this:
using System.Threading.Tasks;
using NServiceBus;
using NServiceBus.Logging;
using Messages;

namespace Shipping
{
    public class OrderPlacedHandler :
        IHandleMessages<OrderPlaced>
    {
        static ILog log = LogManager.GetLogger<OrderPlacedHandler>();

        public Task Handle(OrderPlaced message, IMessageHandlerContext context)
        {
            log.Info($"Shipping has received OrderPlaced, OrderId = {message.OrderId}");
            return Task.CompletedTask;
        }
    }
}
Run the updated solution
Now run the solution, and assuming you remembered to update the startup projects, a window for the Shipping endpoint will open in addition to the other three.
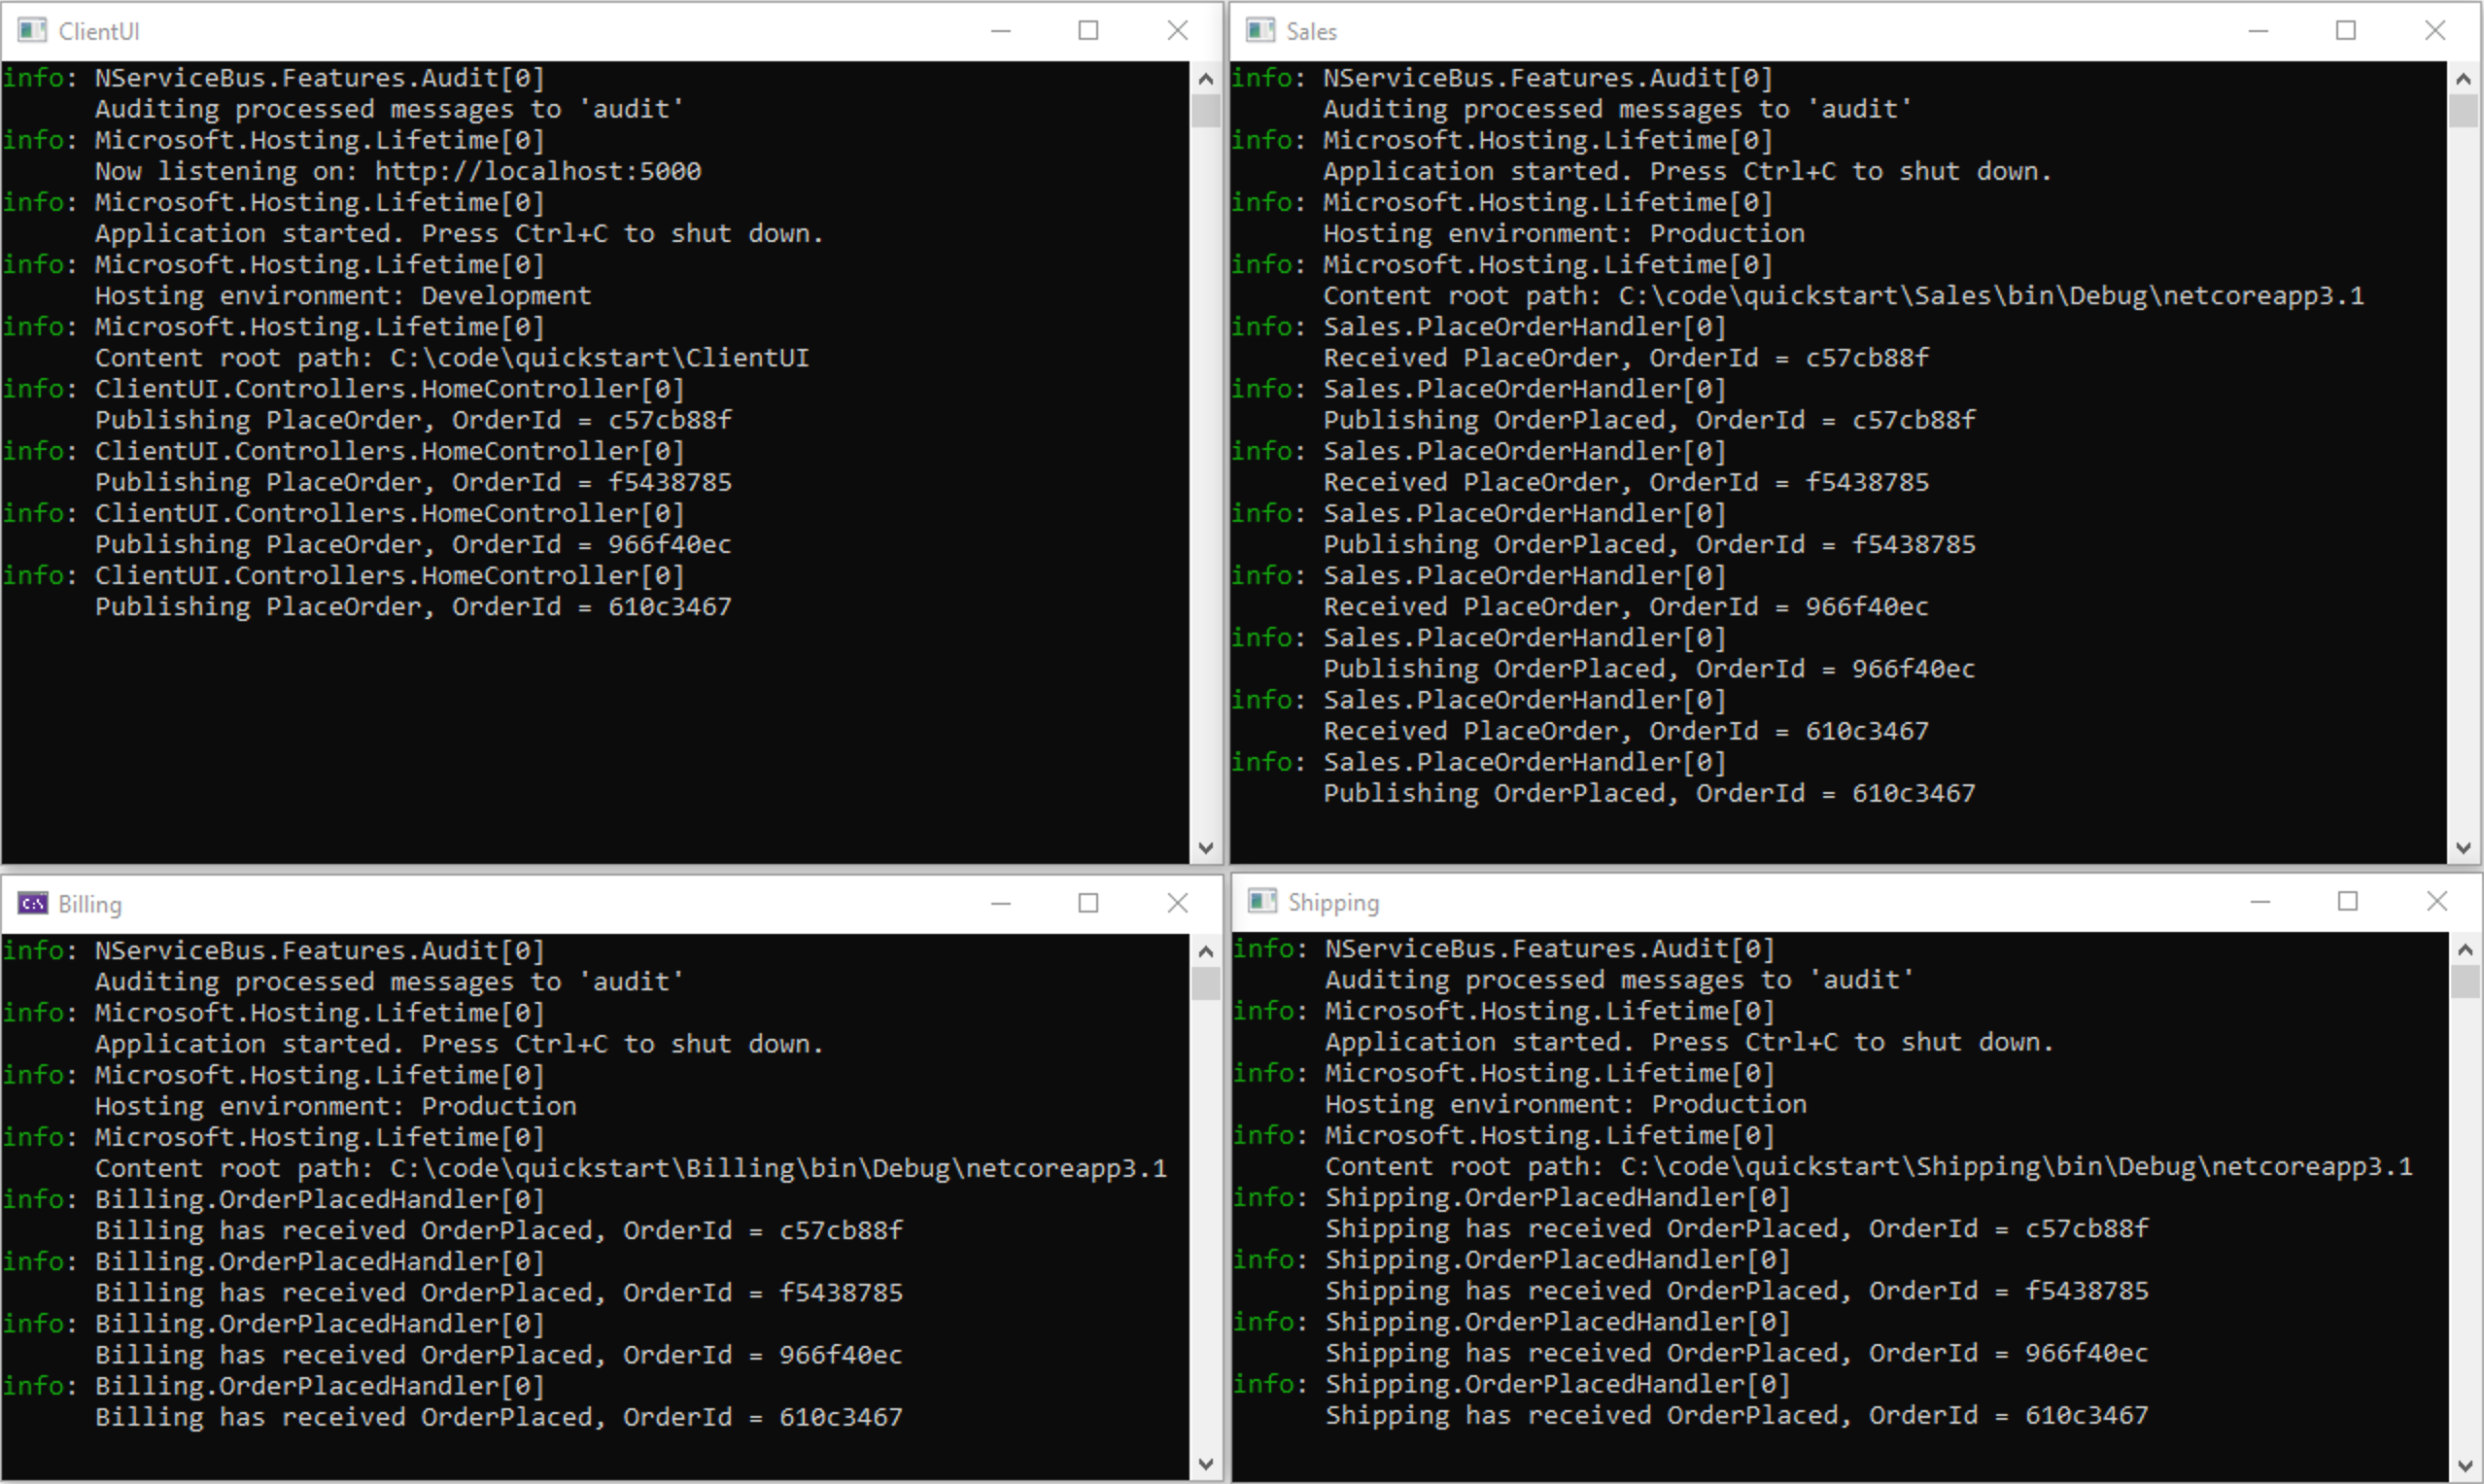
As you place orders by clicking the button in the ClientUI web view, you will see the Shipping endpoint reacting to OrderPlaced events:
INFO Shipping has received OrderPlaced, OrderId = 25c5ba63
Shipping is now receiving events published by Sales without having to change the code in the Sales endpoint. Additional subscribers could be added, for example, to email a receipt to the customer, notify a fulfillment agency via a web service, update a wish list or gift registry, or update data on items that are frequently bought together. Each business activity would occur in its own isolated message handler and doesn't depend on what happens in other parts of the system.
You may also want to take a look at the ServicePulse window, where you should now be able to see heartbeat and endpoint monitoring information for the new endpoint as well.
Summary
In this tutorial, you explored the basics of how a messaging system using NServiceBus works.
You learned that asynchronous messaging failures in one part of a system can be isolated and prevent complete system failure. This level of resilience and reliability is not easy to achieve with traditional REST-based web services.
You saw how automatic retries provide protection from transient failures like database deadlocks. If you implement a multi-step process as a series of message handlers, then each step will be executed independently and can be automatically retried in case of failures. This means that a stray exception won't abort an entire process, leaving the system in an inconsistent state.
You saw how the tooling in the Particular Service Platform makes running a distributed system much easier. ServicePulse gives you critical insights into the health of a system, and allows you to diagnose and fix systemic failures. You don't have to worry about data loss, once you redeploy your system, you can replay failed messages in batches as if the error had never occurred.
You also implemented an additional event subscriber, showing how to decouple independent bits of business logic from each other. The ability to publish one event and then implement resulting steps in separate message handlers makes the system much easier to maintain and evolve.
Now that you've seen what NServiceBus can do, take the next step and learn how to build a system like this one from the ground up. In the next tutorial, find out how to build the same solution starting from File > New Project.